

Do you know there is a lot more money that can be made from printing as a business owner?
Sure you do! It’s time to fight your fears so you can stop missing out on opportunities by understanding the necessary print principles!
There is great satisfaction in giving your customers the best quality down to the last detail. Apart from seeing your materials come out in print as crisp as you envisioned, you also get to impress your customers and generate more revenue from repeat business.
Worry no more! This guide will share 13 essential principles of printing so that you can master the print process and make smarter business decisions.
All images used in this post are for reference purposes only. They do not belong to us and remain the property of their respective owners.
As with most things ‘pre’, pre-press is all the activity that is executed before paper can pass through the printing machine.

When preparing a document for printing, set the colour mode to CMYK (Cyan, Magenta, Yellow, and Black). Be careful that your design software isn’t set to RGB, which is used for digital screens. Many RGB colours cannot be replicated in CMYK, leading to colour inconsistencies in print.
There’s nothing wrong with placing colours on a coloured background or allowing colours to kiss each other, but you must be careful which colours you choose.
For example, it can be extremely difficult to read red text on a green background. Also, content can blend and get lost after print if you set it in a different shade of the same colour as the background.
As for kissing colours, on certain print process, no problem at all. But for some such as screen printing, it can become a nightmare to keep them fixed in the same spot which can lead to the colours smearing into each other.
If you can avoid colour overlapping and kissing, just save yourself and do so!

You can use almost any font you wish as long as it is easily readable.
However, as romantic as it is to admire a thin variant of a font, if you use it on a coloured background (instead of white), it can quickly lead to smear heartbreaks with offset printing; except you set it in a large font size.
For offset type of printing (not Digital Imaging), as much as possible, set your font in one of the CMYK colours; any shade of Cyan, Magenta, Yellow, or Black is perfect. If you can’t do this with your client’s brand colours, it’s not a problem. An experienced printing press will make it happen. Otherwise what will happen is that you will see your text seeming to repeat and overlap itself in different colours. Problem!
Always convert all text to curve or outline if using Coreldraw or Adobe Illustrator respectively. Avoid converting text to raster or images as this can result in smearing. Another Problem!

The print standard for images is 300 DPI. You can occasionally get away with 150 DPI, but if you don’t have to print at 150 DPI, you shouldn’t.
Buying high-resolution stock photos or hiring a professional photographer can solve this problem.
Taking images directly from Google can end up leading to problems because most images on Google have already been optimized for the web, which is a measly 72 DPI. Plus, there’s a possibility of copyright infringement,

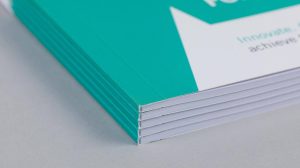
A bleed is printing that goes beyond the edge of where the paper will be trimmed. That is to say, the bleed is the line that will be trimmed off.
When setting up your page, you must remember to add 1/4 inch of space from the edge of the paper for your bleed.
If you want a background colour to fill the entire page, let it exceed beyond the bleed line, if you want part of a font of the picture to be sliced off, let it exceed the line.
Anything that cuts across or comes too close to this line, consider it cut off! So, if you do not want something yanked off, make sure to give it another 1/4 inch of space away from the bleed line.
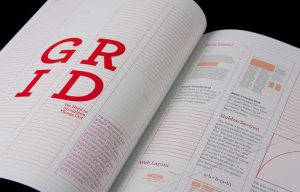
Before you begin designing any element, you should decide on several layout options that would best showcase your design.
Grids are the fundamentals for ensuring consistency across your entire design layout. It helps create both stable symmetrical and dynamic asymmetrical compositions.
By breaking down space into smaller units, grids will encourage you to leave some areas open, making your work aesthetically pleasing, rather than fill up the whole page.
For offset printing, a color print film is required to convert your design into a negative image, which is thereafter transferred onto a printing plate.
Printing plates are flat sheets of metal. A plate is required for each of the four CMYK colours if you’re executing the full colour process or one for every color in the design to be printed if you are executing the spot colour process.
Once done, the plates are attached to cylindrical plate holders where ink and water are applied as the paper material passes through.
Offset printing relies on the use of printing plates to transfer your design onto paper.
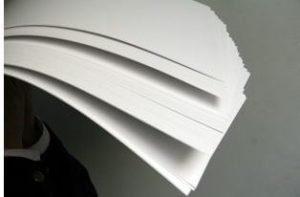
For every printing need, there’s a specific type of paper that is required for the job.
There are so many sheet types and sizes available on the market and so, for the sake of simplicity, we are going to outline the ones you’re most likely to use every day, which are:
Grammage (Thickness)
Let’s say GSM is like the SI unit for grammage. GSM stands for ‘Grams per square meter’. The higher the GSM, the thicker and sturdier the paper.
To give you an idea, most business cards are usually printed on 300gsm Matte Paper, while most fliers are printed on 135gsm Art Paper.
Some of the popular paper grammage weights are;

Understanding paper sizes helps in ordering the correct dimensions. Here are common sizes:
| Size | Dimensions (mm) | Common Uses |
|---|---|---|
| A0 | 84.1 x 118.9 cm | Large Posters |
| A1 | 59.4 x 84.1 cm | Posters |
| A2 | 42.0 x 59.4 cm | Posters |
| A3 | 29.7 x 42.0 cm | Wall Calendars |
| A4 | 21.0 x 29.7 cm | Brochures |
| A5 | 14.8 x 21.0 cm | Flyers |
| A6 | 10.5 x 14.8 cm | Thank You Cards |
| A7 | 7.4 x 10.5 cm | Product Tags |
| DL | 22.0 x 11.0 cm | Small Envelopes |
| C4 | 22.9 x 32.4 cm | A4 Envelope |
As a simple guide, A4 is standard office printing paper. A3 is x2 of it and so forth going up. A5 is /2 of it and so forth going down.
Below are other common sizes you need to know
ID Card 8.38 x 5.33 cm
Business Card 9.14 x 5.59 cm
Roll-up Banner 83 x 205 cm
Press is the actual process of passing the paper through the machine!

This is printing directly from your computer onto paper or PVC, using a high-volume laser or inkjet printer. No film or plate is required.
The beauty of DI printing is that it has excellent color consistency, allows for minimal quantity print and short turnaround time. This is what we use for our 24-hour delivery here at Print You Love

If you’re printing in thousands, this is it! This is the right one to use. In commercial offset printing, the more you print, the less you pay.
After the initial cost of film and plate during setup, you will only spend a fixed amount per sheet of paper and a fixed amount for impression per 1000 paper.
This printing technique does not transfer ink directly onto paper as DI printing does. It requires transferring your design into a film (although it’s not necessary anymore as CTP technology is now available), then to a plate. The plates are then attached to cylinders contained in the offset machine and ink is transferred to the plate through a rubber cylinder and then printed on paper.
Some of the most popular offset printing machines are;
| 201 | Kord | Speed Master |
| GTO | MO | Komori |
Post-Press is usually called finishing. It is everything that takes place after your design has been printed.

Lamination refers to the process of bonding a clear plastic film onto printed matter. It is most common to bond the film to both sides of the printed piece so that the piece is totally enclosed in plastic. Printed pieces are laminated to protect them from stains, smudges, moisture, wrinkles, tears, or anything else that might shorten their useful life.
In addition to protection, print lamination also adds strength and rigidity. These three are the most popular types of lamination you will get to use every day:

This is using metallic paper (foil) to create a classy, shiny effect on a print material, usually paper.
They come in a wide selection of colours and finishes allowing you to achieve most of your creative vision.

As the name implies, it is the process of pressing an image into paper to create a three-dimensional effect.
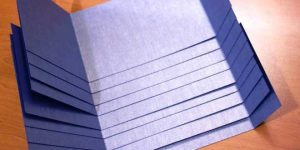
No, this is not one of the points for arguing who is better between Ronaldo and Messi! It is the process of which a professional machine is used to create a folding line in a paper so folding can be clean and consistent.
This allows the paper to be folded easily, with minimal cracking.
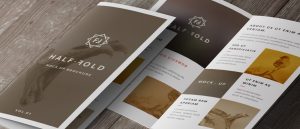
As the name implies, you fold. Not every print document need folding however for documents like booklets, tri-fold brochures (the irony right?), company profile, and more, folding is required to process it into the finished document.
This is the process of assembling sheets of paper together and sticking them together to become one document.
Below are some types of binding you should know:
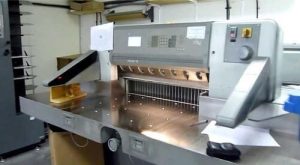
You definitely know what this is but for emphasis sake, it is the separation of pages that have been printed together,
Here are some types of cutting you need to know:
Ladies and gentlemen that is it! A quick rundown of the entire print process!
Mastering these 13 print principles will help you as a business owner make informed printing decisions, reduce errors, and maximise return on investment. Whether you’re printing marketing materials, business cards, or promotional flyers, understanding these concepts ensures you get the best quality results.
You still want to simplify things for yourself? Who doesn’t? We’ve got you!
We’ve created several print templates that will make sure your designs are print-ready and limit the risk of you committing print blunders.
Click here to download free templates designed by Yox Novero and start designing for the best result.